Meal Type: Dinner

  • Yu Xiang Eggplant (Fish-Fragrant Eggplant)

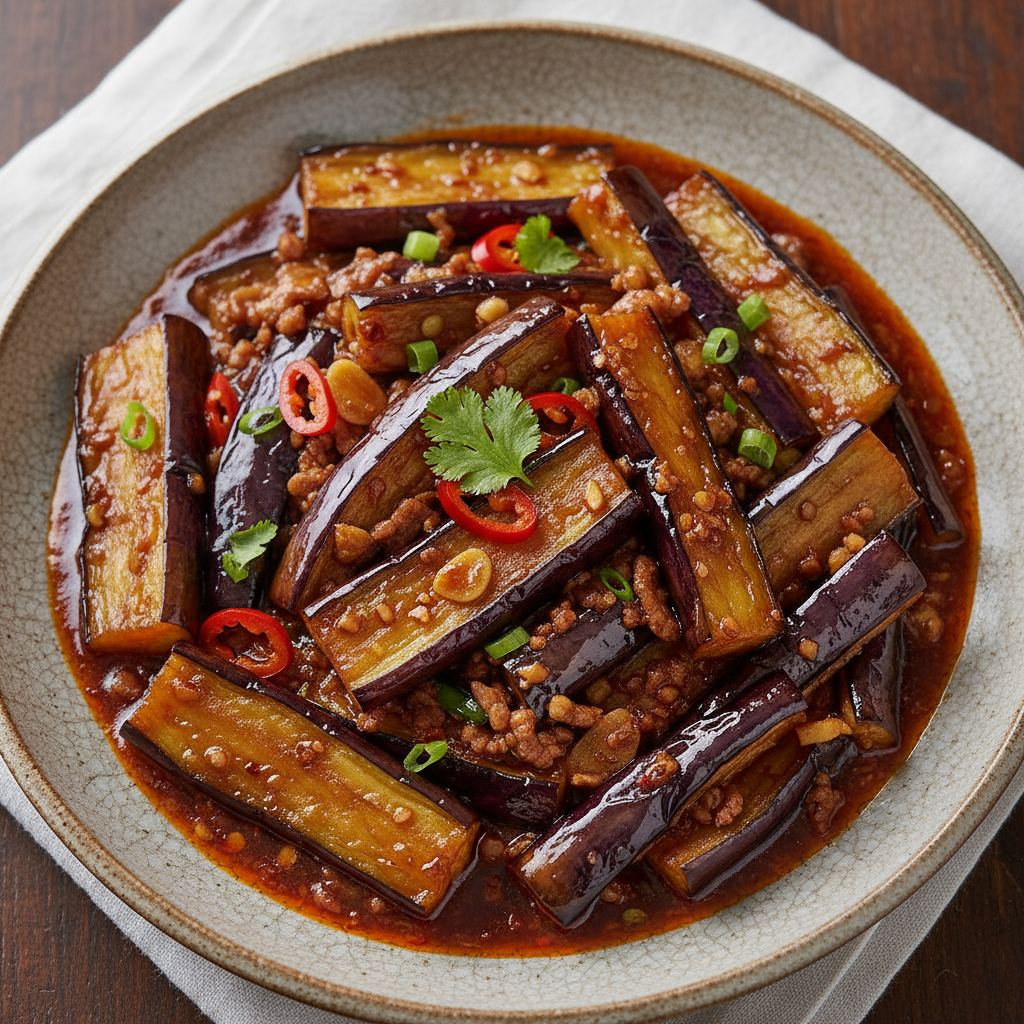
    Yu Xiang Eggplant (Fish-Fragrant Eggplant)

    Step 1 (Prep Eggplant: Cut 600g eggplant into 2×1-inch batons. Soak in salted water (1 tbsp salt per liter) for 15 minutes to prevent discoloration and reduce oil absorption. Drain and pat completely dry with paper towels (critical for proper frying).

    Step 2 (Blanch Mushrooms: Soak wood ear mushrooms in hot water for 20 minutes until expanded. Slice thinly. Blanch in boiling water for 2 minutes, drain.

    Step 3 (Fry Eggplant: Heat 1/2 cup oil in wok to 180°C (350°F). Fry eggplant in batches for 3-4 minutes until softened and lightly golden. Remove and drain on rack. Pour off all but 2 tbsp oil.

    Step 4 (Cook Pork: If using, add 100g ground pork to wok. Stir-fry over medium-high for 3 minutes until crispy and rendered. Push to side.

    Step 5 (Build Flavor: Add 1.5 tbsp doubanjiang to center. Stir-fry for 60 seconds until oil turns red. Add minced garlic, ginger, and white parts of green onions. Stir-fry 30 seconds. Combine with pork.

    Step 6 (Simmer: Add fried eggplant and sliced mushrooms. Pour in sauce mixture (1 tbsp soy, 1 tbsp vinegar, 2 tsp sugar, 1 tbsp Shaoxing wine, 1/4 cup broth). Gently toss to coat. Simmer over medium-low for 4-5 minutes until eggplant is very tender.

    Step 7 (Thicken & Store: Stir cornstarch slurry, drizzle into wok while tossing. Cook 1-2 minutes until sauce thickens and clings. Garnish with green onion greens. Serve hot with rice. Leftovers refrigerate for 3 days; flavor improves. Reheat gently. Not suitable for freezing as eggplant becomes mushy.
  • Gyudon (Beef Rice Bowl)

    Gyudon (Beef Rice Bowl)

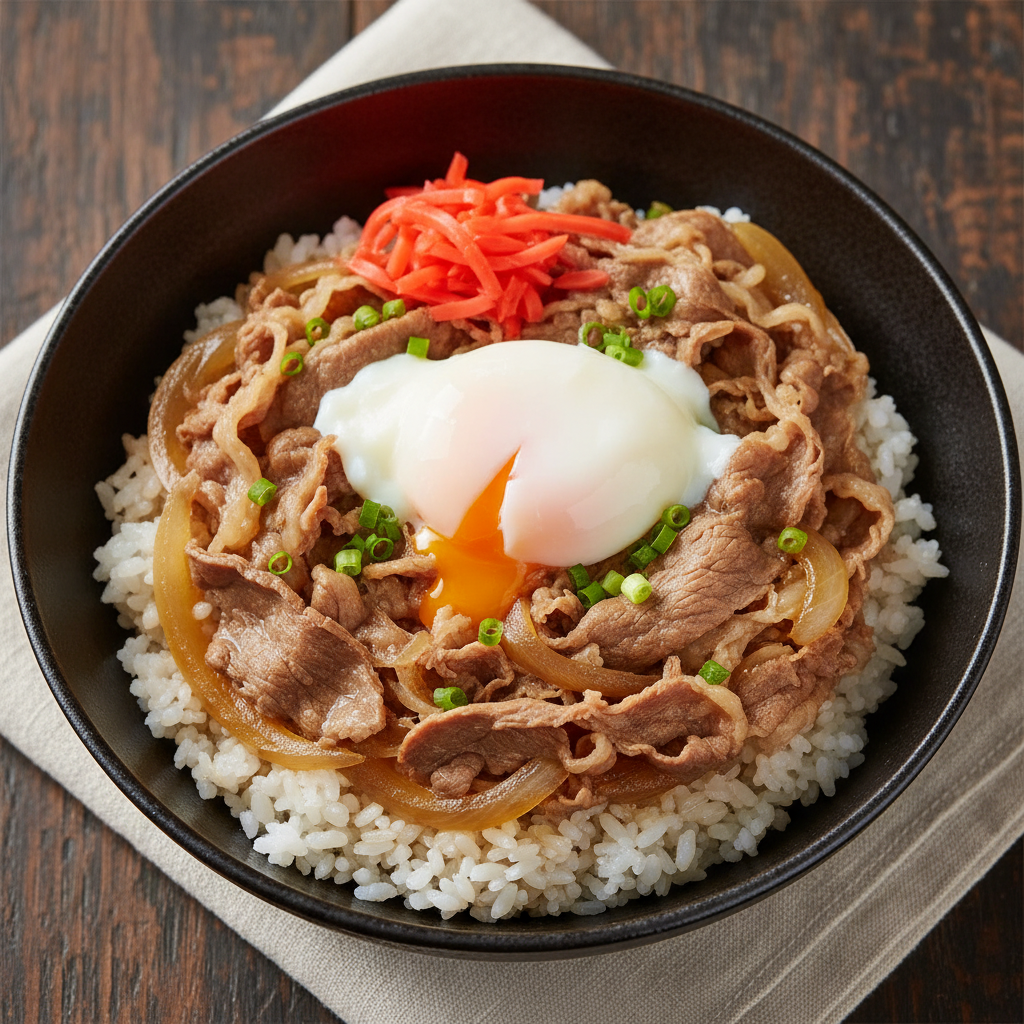
    1. **Broth Preparation:** In pan, combine dashi, soy sauce, mirin, sugar, grated ginger. Bring to simmer over medium heat (85°C/185°F). Add thinly sliced onion, cook 3 minutes. [PREP: Slice onion 2mm thick, separate beef slices] 2. **Cooking Beef:** Add beef slices in single layer. Simmer 4-5 minutes at 82°C/180°F until beef is cooked through but still tender. [CRITICAL: Do not stir vigorously – gently push beef into broth to maintain slice integrity] 3. **Reducing:** Continue simmering 2-3 minutes until liquid reduces by ⅓. [TECHNIQUE: Skim any foam for clear broth] 4. **Assembly:** Divide hot rice into deep bowls. Arrange beef and onions over rice, spoon over remaining broth. [SERVE: Immediately topped with beni shoga and optional poached egg. STORE: Not recommended – beef becomes tough when reheated.]

  • Mapo Tofu

    Mapo Tofu

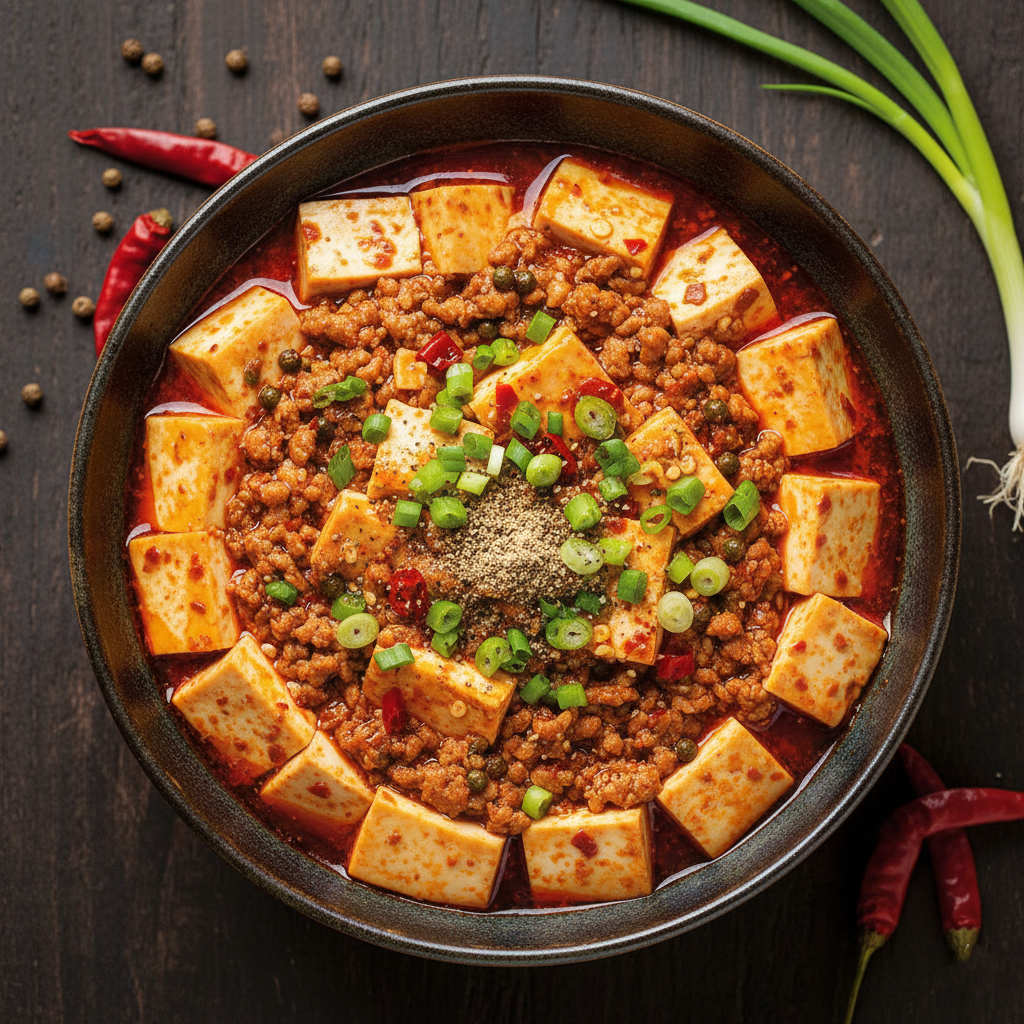
    Step 1 (Prep Tofu): Gently place 400g of 1-inch tofu cubes in a bowl of lightly salted warm water. Let soak for 10 minutes (this firms it up and removes bean taste). Drain carefully before using.

    Step 2 (Toast & Grind): In a dry wok over low heat, toast 1 tsp Sichuan peppercorns for 60 seconds until fragrant. Grind into a fine powder using a mortar/pestle. Set aside.

    Step 3 (Cook Pork): Heat 1 tbsp oil in wok over medium-high. Add 150g ground pork. Break it up and stir-fry for 3-4 minutes until crispy and no longer pink. Push pork to the side.

    Step 4 (Build Sauce): In the center, add 1.5 tbsp Doubanjiang. Stir-fry for 60 seconds until the oil turns red. Add minced garlic, ginger, and 1 tsp whole Sichuan peppercorns; fry for 30 seconds. Combine with pork.

    Step 5 (Braise Tofu): Pour in 1 cup chicken stock and 1 tsp soy sauce. Gently slide in drained tofu. Do not stir; shake the wok gently to distribute. Bring to a simmer, then reduce heat to medium-low. Cook for 5 minutes, spooning sauce over tofu.

    Step 6 (Thicken & Finish): Slowly drizzle in cornstarch slurry while gently shaking wok. Cook for 1-2 minutes until sauce thickens and clings to tofu. Turn off heat, drizzle with 1 tbsp chili oil and half the ground Sichuan pepper.

    Step 7 (Serve & Store): Garnish with green onions and remaining Sichuan pepper. Serve immediately with plenty of steamed rice. Store leftovers in fridge for 1-2 days; texture will soften. Not suitable for freezing.

  • Sukiyaki

    Sukiyaki

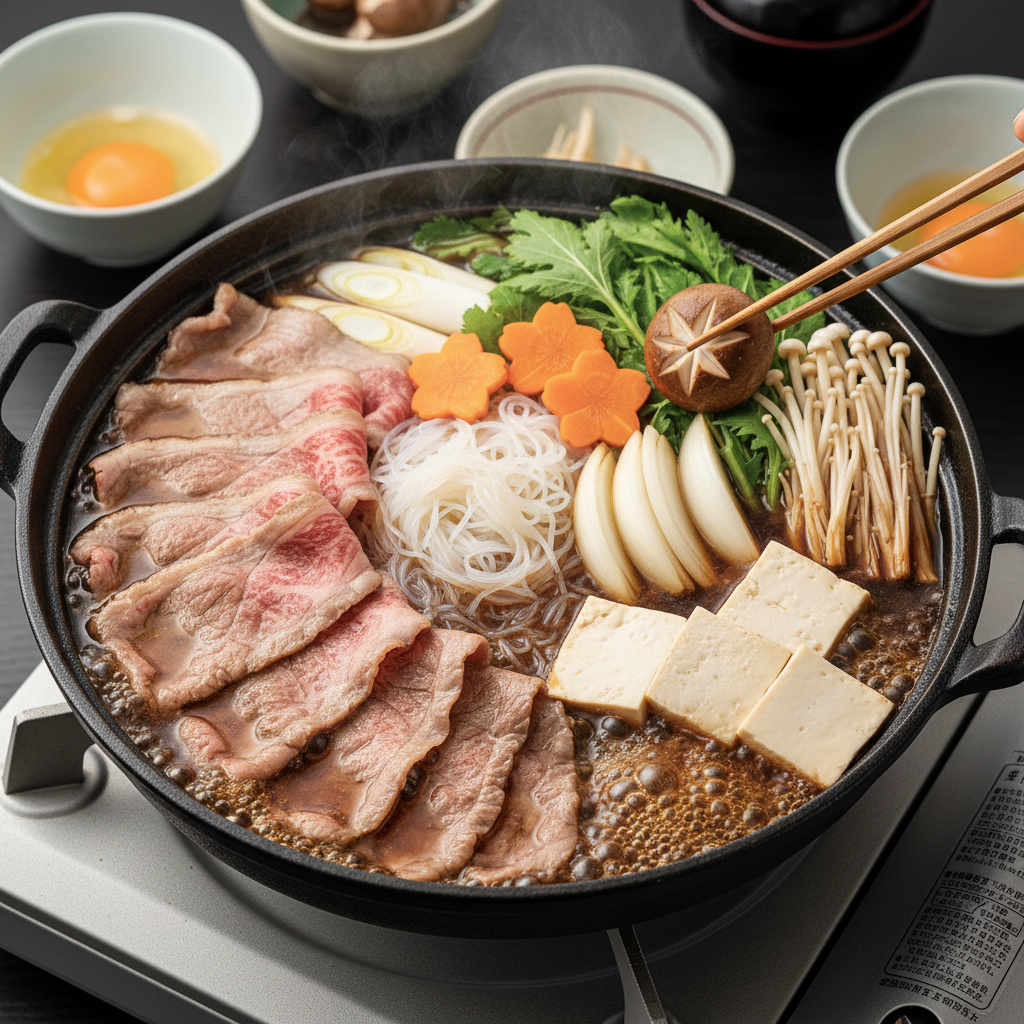
    1. **Broth Preparation:** Combine ½ cup soy sauce, ¼ cup mirin, ¼ cup sake, 3 tbsp sugar in saucepan. Heat gently to 60°C (140°F) until sugar dissolves, do not boil. [CRITICAL: Never boil warishita – destroys delicate balance] [PREP: Cut tofu into 2cm cubes, carrot into flower shapes, onion 45° diagonal slices] 2. **Assembly in Pot:** Heat sukiyaki pan or heavy skillet to medium (150°C/300°F). Arrange beef slices in single layer, cook 30 seconds per side just until color changes. Push to side. [TECHNIQUE: Use chopsticks to arrange ingredients in neat sections] 3. **Adding Vegetables:** Arrange vegetables, tofu, shirataki in remaining space. Pour warishita sauce to cover bottom 1cm. Cover, simmer at 85°C/185°F for 10 minutes. [CRITICAL: Do not stir – ingredients should cook in their sections] 4. **Dipping & Serving:** Crack raw egg into each bowl, beat lightly. Diners dip cooked items into egg. [SERVE: At table over portable burner. STORE: Not recommended – consume immediately.]

  • Yangzhou Fried Rice

    Yangzhou Fried Rice

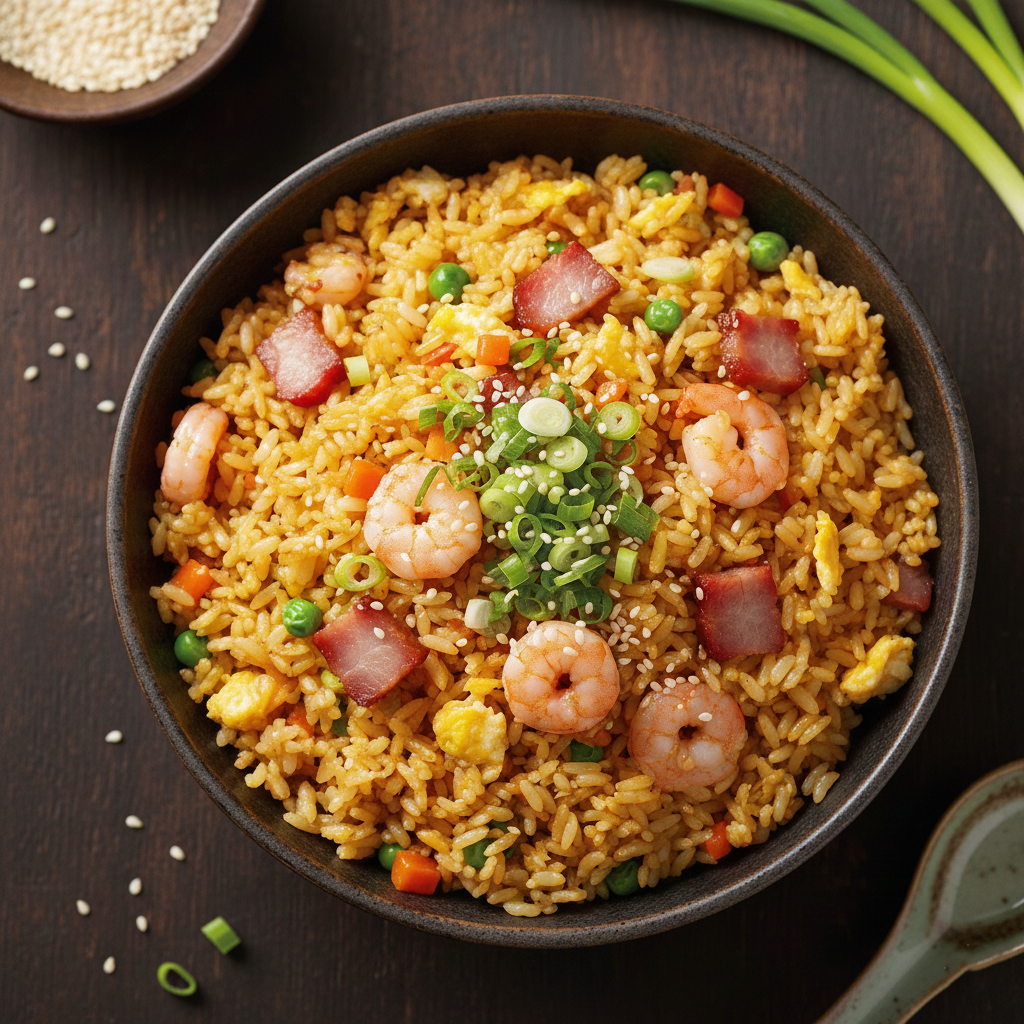
    Step 1 (Prep Rice): Break up 3 cups of day-old, cold rice with wet hands to ensure grains are separate (critical for non-clumpy fried rice). Have all diced ingredients (shrimp, pork, peas/carrots) measured and ready.

    Step 2 (Scramble Eggs): Heat wok over high until smoking. Add 1 tbsp oil, swirl to coat. Pour in beaten eggs. Let set for 10 seconds, then scramble quickly into large curds for 30 seconds. Remove immediately.

    Step 3 (Stir-fry Proteins): Add remaining 1 tbsp oil. Add shrimp and char siu. Stir-fry for 1-2 minutes until shrimp turn pink and pork is lightly crisped.

    Step 4 (Fry Rice): Add rice to wok. Use the back of a spatula to press and toss for 2-3 minutes until grains are dry, separated, and slightly toasted.

    Step 5 (Combine): Add thawed peas/carrots. Return eggs. Sprinkle 1 tbsp soy sauce around the rim of the wok (for wok hei aroma). Add 1/2 tsp salt, 1/4 tsp white pepper. Toss everything on high heat for 90 seconds until evenly mixed.

    Step 6 (Finish): Turn off heat. Stir in green onions. Taste and adjust seasoning.

    Step 7 (Serve & Store): Serve hot as a main dish. For best texture, consume immediately. Leftovers can be refrigerated for 1 day and reheated in a wok; microwave steaming will make it soggy.

  • Nikujaga (Japanese Meat & Potatoes)

    Nikujaga (Japanese Meat & Potatoes)

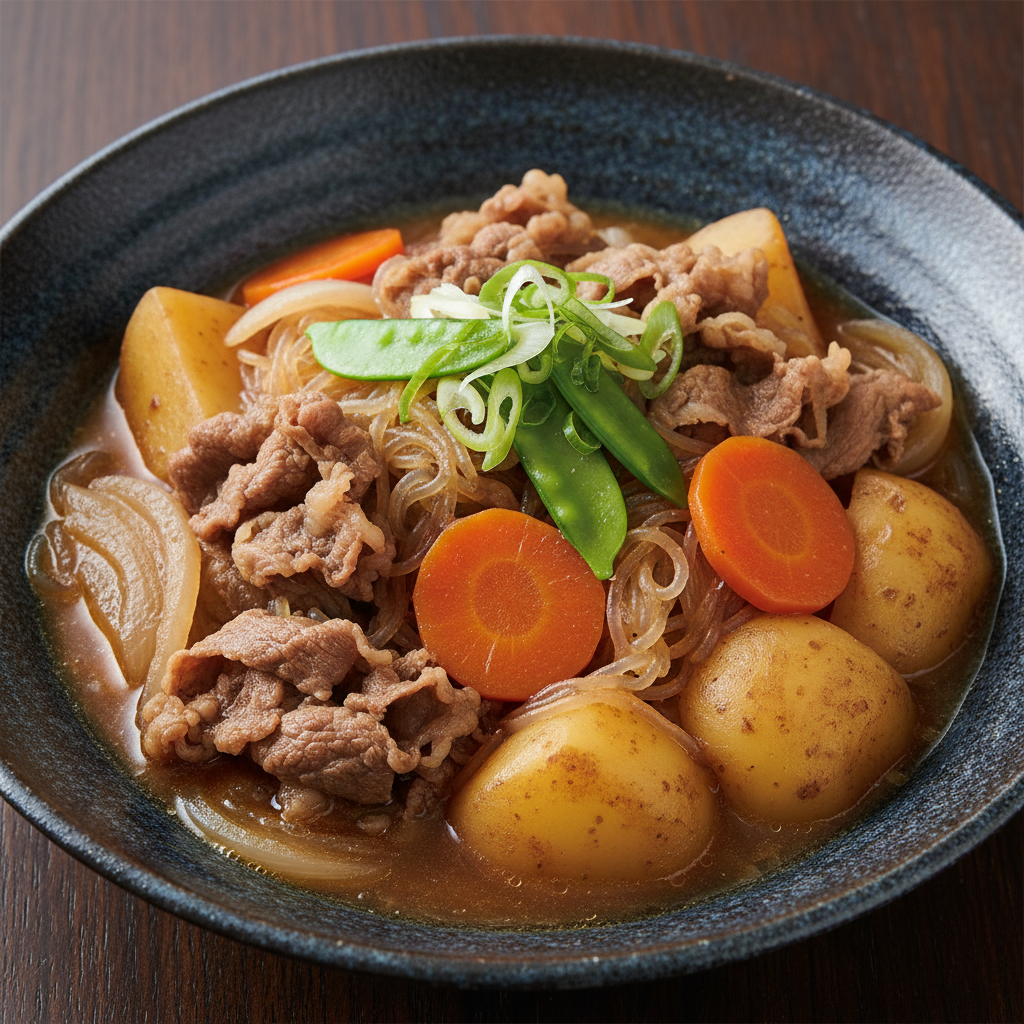
    1. **Meat Preparation:** Heat oil in deep pot over medium-high (180°C/350°F). Brown meat 2-3 minutes until no longer pink. Remove and set aside. [PREP: Cut potatoes into 4cm chunks, carrots 2cm rounds, onion 8 wedges] 2. **Vegetable Sauté:** In same pot, add onions, cook 3 minutes until translucent. Add potatoes and carrots, cook 5 minutes stirring occasionally. [CRITICAL: Lightly brown vegetables for deeper flavor] 3. **Simmering:** Return meat to pot, add dashi, soy sauce, sugar, mirin, sake. Bring to boil, then reduce to low simmer (85°C/185°F). Add rinsed shirataki. Simmer covered 20 minutes. [TECHNIQUE: Skim foam every 5 minutes for clear broth] 4. **Reducing:** Remove lid, increase heat to medium (95°C/203°F). Cook 5-7 minutes until sauce reduces by half. [SERVE: Hot with rice. STORE: Tastes better next day – refrigerate 3 days. Reheat gently.]

  • Chinese Pork & Cabbage Dumplings

    Chinese Pork & Cabbage Dumplings

    Step 1 (Make Dough): In a bowl, mix 2.5 cups flour with 1 cup warm water (50°C/120°F). Knead for 8-10 minutes until smooth and elastic. Cover with a damp cloth and rest for 30 minutes (critical for gluten relaxation and easy rolling).

    Step 2 (Prep Cabbage): Toss 200g chopped cabbage with 1/2 tsp salt. Let sit for 15 minutes. Squeeze firmly in a clean cloth to remove all excess water (this prevents soggy filling).

    Step 3 (Mix Filling): In a bowl, combine pork, cabbage, green onions, ginger, 2 tbsp soy sauce, 1 tbsp sesame oil, 1 tsp salt, 1/2 tsp white pepper. Stir vigorously in one direction for 3-4 minutes until mixture is sticky and cohesive.

    Step 4 (Roll Wrappers): Divide dough into 40 pieces. Roll each into a 3-inch circle, keeping the center slightly thicker than edges (helps prevent bursting when sealing). Cover unused dough.

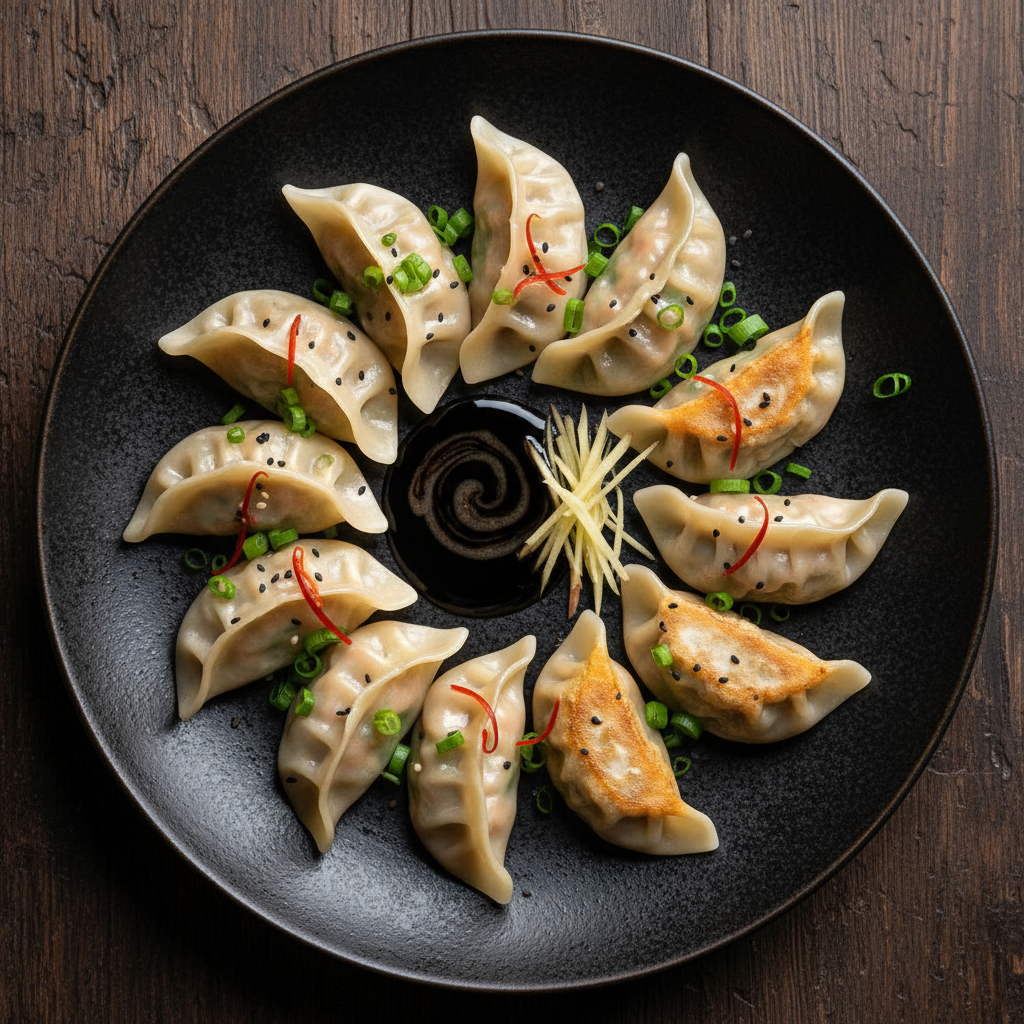
    Step 5 (Fill & Pleat): Place 1 tbsp filling in center. Fold wrapper in half, pinch center. Using your thumb and index finger, make 3-4 pleats on each side, pressing firmly to seal (ensure no air pockets). Place on a floured tray.

    Step 6 (Cook): TO BOIL: Bring a large pot of water to rolling boil. Add dumplings in batches. Stir gently. When water returns to boil, add 1 cup cold water. Repeat twice (three boils total). Dumplings are done when they float and wrappers are slightly translucent, about 8-10 minutes. TO PAN-FRY: Heat 2 tbsp oil in non-stick skillet over medium-high. Arrange dumplings flat-side down. Cook for 3 minutes until golden brown. Add 1/2 cup water, cover immediately, reduce heat to medium. Steam for 6-7 minutes until water evaporates. Uncover, cook 1 more minute to crisp.

    Step 7 (Serve & Store): Serve hot with black vinegar and chili oil. Uncooked dumplings can be frozen on a tray, then transferred to a bag for 3 months. Cook from frozen, adding 2 extra minutes to boiling time. Cooked leftovers refrigerate for 2 days; reheat by pan-frying.

  • Chirashizushi (Scattered Sushi)

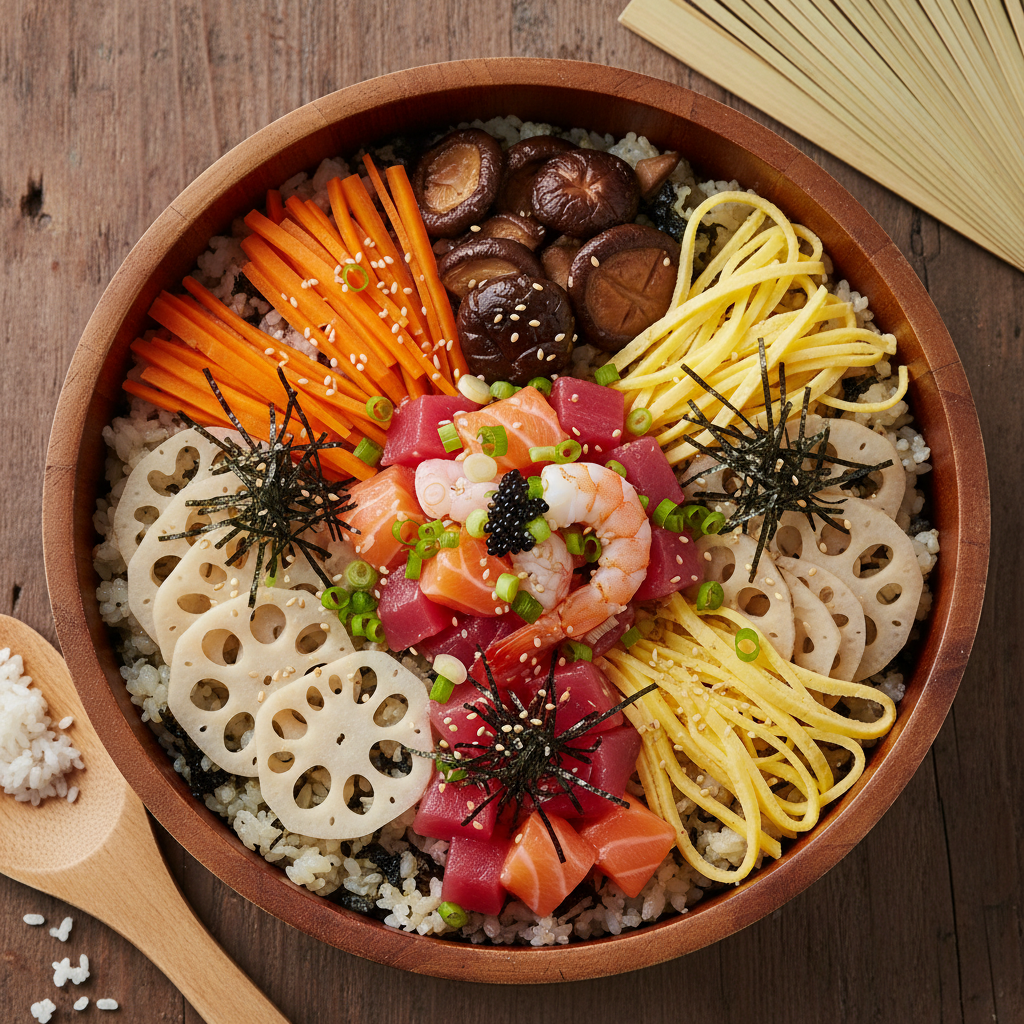
    Chirashizushi (Scattered Sushi)

    1. **Sushi Rice:** Wash rice until water clear, soak 30 minutes. Cook with water. Meanwhile, heat vinegar, sugar, salt to 40°C (104°F) until dissolved. Fold into hot rice while fanning to body temperature (37°C/98°F). [CRITICAL: Use wooden bowl and paddle, fan continuously while mixing] 2. **Toppings Preparation:** Thinly slice carrot, soak shiitake, lotus root. Cook each separately: carrot 2 minutes in boiling water, shiitake in 2 tbsp dashi/1 tbsp soy sauce/1 tsp sugar for 5 minutes, lotus root in vinegar water 3 minutes. [PREP: Cut all toppings into similar sizes for visual harmony] 3. **Thin Omelette:** Beat eggs with pinch sugar, strain. Cook in non-stick pan at low heat (120°C/250°F) in thin layers, roll, slice into thin strips. [TECHNIQUE: Maintain low heat for uniform yellow color without browning] 4. **Assembly:** Spread sushi rice in large dish. Arrange toppings in colorful sections. [SERVE: Room temperature. Garnish with nori. STORE: Consume within 4 hours. Do not refrigerate rice.]

  • Sweet and Sour Pork

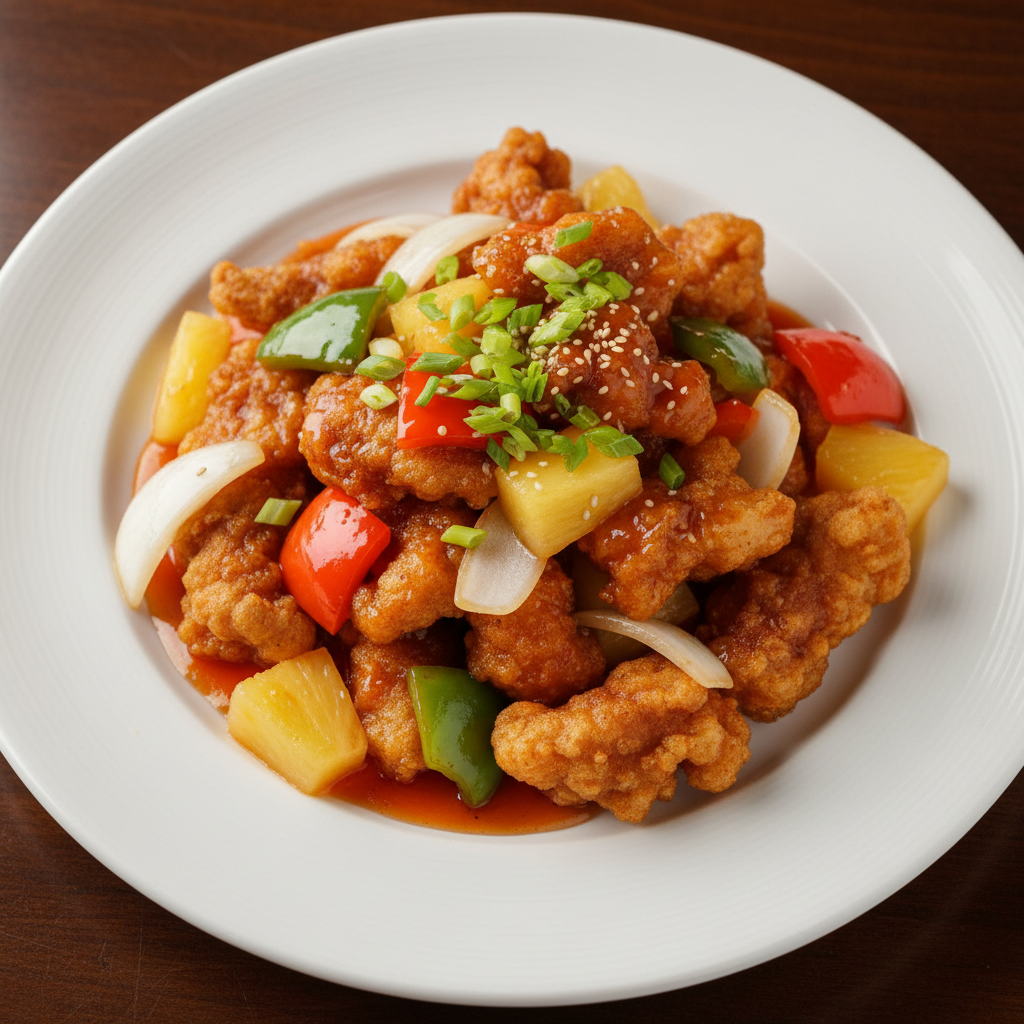
    Sweet and Sour Pork

    Step 1 (Marinate Pork): Cut 400g pork tenderloin into 1/2-inch thick strips against the grain (critical for tenderness). Combine with 1/2 tsp salt, 1 tbsp Shaoxing wine, and 1 tsp cornstarch. Mix well and marinate at room temperature for 15 minutes.

    Step 2 (Make Batter): While pork marinates, prepare batter. Whisk together 1/2 cup cornstarch, 1/4 cup flour, 1/2 tsp baking powder. Gradually add 1/2 cup ice-cold water while whisking until smooth (the cold water creates a crispier coating). Stir in 1 tbsp oil. Let batter rest 10 minutes.

    Step 3 (Prep Sauce & Vegetables): Combine all sauce ingredients except cornstarch slurry in a bowl. Set aside. Have all cut vegetables ready (1-inch pepper squares, onion pieces).

    Step 4 (Fry Pork): Heat 2 cups oil in wok to 170°C (340°F). Test by dropping a bit of batter; it should sizzle and float immediately. Dip each pork strip in batter, let excess drip, then carefully lower into oil. Fry in batches for 3-4 minutes until light golden. Remove and drain on rack. Increase oil temp to 190°C (375°F). Refry all pork in one batch for 60-90 seconds until deep golden brown and extra crispy (double-frying is key for crunch that lasts).

    Step 5 (Stir-fry Sauce): Remove all but 1 tbsp oil from wok. Heat over medium. Add sauce mixture and bring to simmer. Stir in cornstarch slurry and cook for 1-2 minutes until thickened to a glossy, syrupy consistency that coats the back of a spoon.

    Step 6 (Combine): Add vegetables and pineapple to sauce. Stir-fry for 2-3 minutes until peppers are tender-crisp. Add fried pork. Toss quickly for 30-45 seconds just to coat (do not overcook or coating will soften).

    Step 7 (Serve & Store): Serve immediately over steamed rice. Garnish with sesame seeds. For best texture, consume immediately. Leftovers will become soggy; store in refrigerator for 1 day and reheat in oven at 180°C (350°F) for 10 minutes to crisp.

  • Yakisoba (Japanese Fried Noodles)

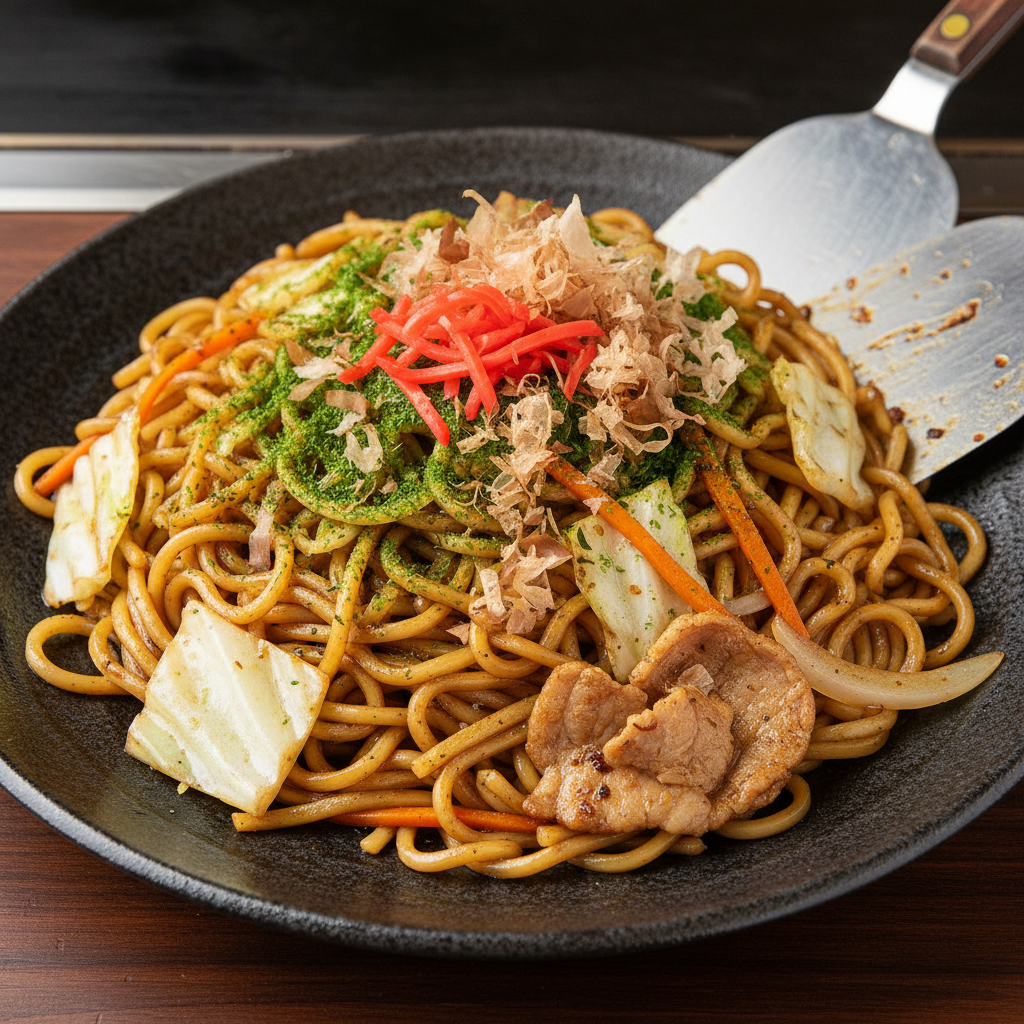
    Yakisoba (Japanese Fried Noodles)

    1. **Vegetable Prep:** Cut cabbage into 2cm squares, carrot julienne 3mm thick, onion sliced 5mm thick. Blanch carrots 1 minute in boiling water. [PREP: Use mandolin for uniform cuts, separate noodles before cooking] 2. **Meat Cooking:** Heat 1 tbsp oil in large pan or teppan to high (200°C/390°F). Add thinly sliced pork belly, cook 3-4 minutes until crisp. Remove. [CRITICAL: Work in batches to avoid steaming] 3. **Stir-frying:** In same pan, add remaining oil. Cook onions 2 minutes, add cabbage, cook 3 minutes until wilted but crisp. Add noodles, sprinkle with 2 tbsp water, cover 1 minute to steam. [TECHNIQUE: Use two spatulas for tossing, not stirring] 4. **Saucing & Finishing:** Return pork to pan, add sauce. Toss continuously over high heat (210°C/410°F) for 2 minutes until caramelized. [SERVE: Immediately topped with aonori, beni shoga, katsuobushi. STORE: Not recommended – noodles become soggy.]